
Wait, It’s Already 2019?
I cannot believe that it’s already March!. Granted, it has been a rollercoaster year so far, but I can hardly believe how quickly we are moving along with 2019. And do I have anything to show for it?…. Nada… OK, that’s a lie.
After losing my Mom last month, I took some time to grieve and sort out the meaning of life. I didn’t actually figure out the meaning, but I did grieve and that has been helpful. Although, I still expect her to leave embarrassing comments on my Facebook posts.
If you are a blogger, you will know what I am about to say is so true. I have, at all times, about a dozen different blog posts either started, half way finished, or just sitting in my head, spinning around waiting for me to take action. I struggle with the fact that I want to do everything this very minute and the reality that I can only do so much at a time. This struggle is behind my finally getting to my first real project of the year, the half bath. And I am only doing half of it.

[Image: With the toilet pulled in late December, it wasn’t until the second week of February that I was able to get back to demo when I pulled the sink.]

[Image: So much wood rot. This is a floorboard pulled directly next to the toilet.]

[Image: Under all the layers of flooring I got down to the original floorboards and discovered 1970s classifieds.]
Pulling up the luan was both easy and hard at the same time. Whoever put it down in the first place used far more nails than were ever necessary. While the luan panels came up without too much effort, there were SO MANY SPLINTERS! (so grateful for leather gloves). But it was what lay underneath the luan that gave me pause. Wood rot was everywhere…. I knew that the boards around the toilet were rotten, but I didn’t realize that most of the remaining boards in the half bath were also rotten as well. Not that this was a total shock, as I could see from basement below that there were LOTS of issues with the bathroom floor.

[Image: Ugh… Another patch job where they filled in a missing section of rotten floor with paint stir sticks from Home Depot.]
And then there is the other elephant in the room. It turns out the rot in the floorboards extends beyond the half bath and into the parlor. Now, let me explain something unique to Philadelphia (and probably also Baltimore and Boston) rowhouses built in the 1850s… Our house is sixteen feet wide. Correction…. Our lot is sixteen feet wide. But because we have shared walls with our neighbors, the interior is only 15′ 2″ wide (The brick party walls are eight inches thick and there is one inch of plaster on each side).
When the house was built in 1852, they inserted sixteen foot long floor joists across the width of our entire house for each floor. They then laid down 10′-16′ random width tongue and groove floorboards directly on the joists (no subfloor). Only then did they build the walls… On top of the floorboards. The upside is that with the exception of the wall dividing the main house and the rear portion (holding up eight tons of brick on the third floor above), there are no load bearing walls in the interior of our entire house.

[Image: Those wires are feeding up into the wall between the half bath and the parlor. You can see the plaster on the wall next to the stir stick. The wall is sitting directly on (rotten) floorboards… Then somebody used a piece of wood grained particle board and drywall screws to fix it… Ugh!]
I initially thought that the 1970s plumbing was the first plumbing in that portion of the house. Originally, the area was the end of a hallway which had a door leading to the rear yard. I uncovered the door frame as I pulled sheetrock off of the wall.

[Image: I had thought that there was no plumbing in this area before the half bath went in during the 70s, but was surprised to discover what clearly looks like holes for hot and cold and a waste pipe between the original rear door and the dining room door.]
I also believe that most of the damage was already there when the half-bath was installed. It is clear that they laid the luan on top of what were essentially already rotten flooring instead of pulling up the boards and doing it the right way. Given that we know the house was a rental for most of the 20th century, it is logical that a landlord was just trying to maximize rental income by installing a half-bath on the first floor without concern about fixing the underlying problem.

[Image: At some point in time, somebody cut into this joist from the top and then covered it up with random lumber… More Ugh! ]

[Image: After cutting a block of wood to fit in the space, I decided I needed to leave a message for the future. Hope the world survives!]

[Image: In order to fix the joist with the missing section, I sistered both sides with 2×10 lumber and 8″ carriage bolts. With my message hidden inside, the joist should last for another 150 plus years.]

[Image: With the joist repaired, it was time to start laying down a new 3/4 inch plywood subfloor.]

[Image: I managed to cut the second piece in only one try… OK, well, one try followed by an additional cut to fit perfectly. I was quite pleased that I got it with only one adjustment. The pencil lines are to ensure my screws are centered on the joists.]

[Image: Since it will be at least until the end of this year before I get back to finishing off the space, I decided a few coats of semi-gloss would make it easier to keep clean.]

[Image: I must say that as much as I love old things, I also love technology, and this dual flush toilet is, if I may say, a delight to use!]

[Image: Of course, Miss Cordelia was returned to her official place of honor. She will stay here until I get back to the space to finish it.]
Mission Accomplished!

[Image: I happened to find the perfect sink for 60% below list by buying it as a returned item on Amazon. It will be installed at a later point in time. Notice the clever cell phone shelf on the toilet paper holder.]
That’s it for now… Next project will be building out and painting my studio.
Oh, before I forget…. If you haven’t already, I would encourage you to check out the ‘True Tales From Old Houses’ podcasts from my blogger friend Stacy over at Blake Hill House. And if you are not following along with Stacy’s house, you really should. She has an amazing old house with lots of fun stories of old house woes.


Great job! I admire your persistence and endurance. Also, way to leave a cliffhanger on the rotten floorboards in the parlor. I’ll be on the edge of my seat…
Ha, I didn’t even think about the fact that fixing the parlor floorboards would be a thing. I hope to complete it in the next couple of months and will certainly post about it.
It’s definitely progress! I like the painted floor, even if it’s just temporary and plywood. It gives it a finished feel even though still in-progress. That looks like Lincrusta sticking to the wall in the former sink and tank locations! Probably someone did a wainscot of it in the entire hallway during the 1870’s or 80’s.
😊😊 The painted floor is the freshest thing in the space beyond the new toilet. It helps to balance out the chunks of missing drywall, dirty insulation, and other remnants of it’s current state of partial completion. I believe it is Anaglypta, Lincrusta is made from embossed linoleum and tended to be fancier and have deeper pattern impressions, whereas Anaglypta is heavily embossed paper designed to be painted. Both are still available.
In fact, somebody did do a wainscot of it in the entire hallway, and we retain nearly all of it.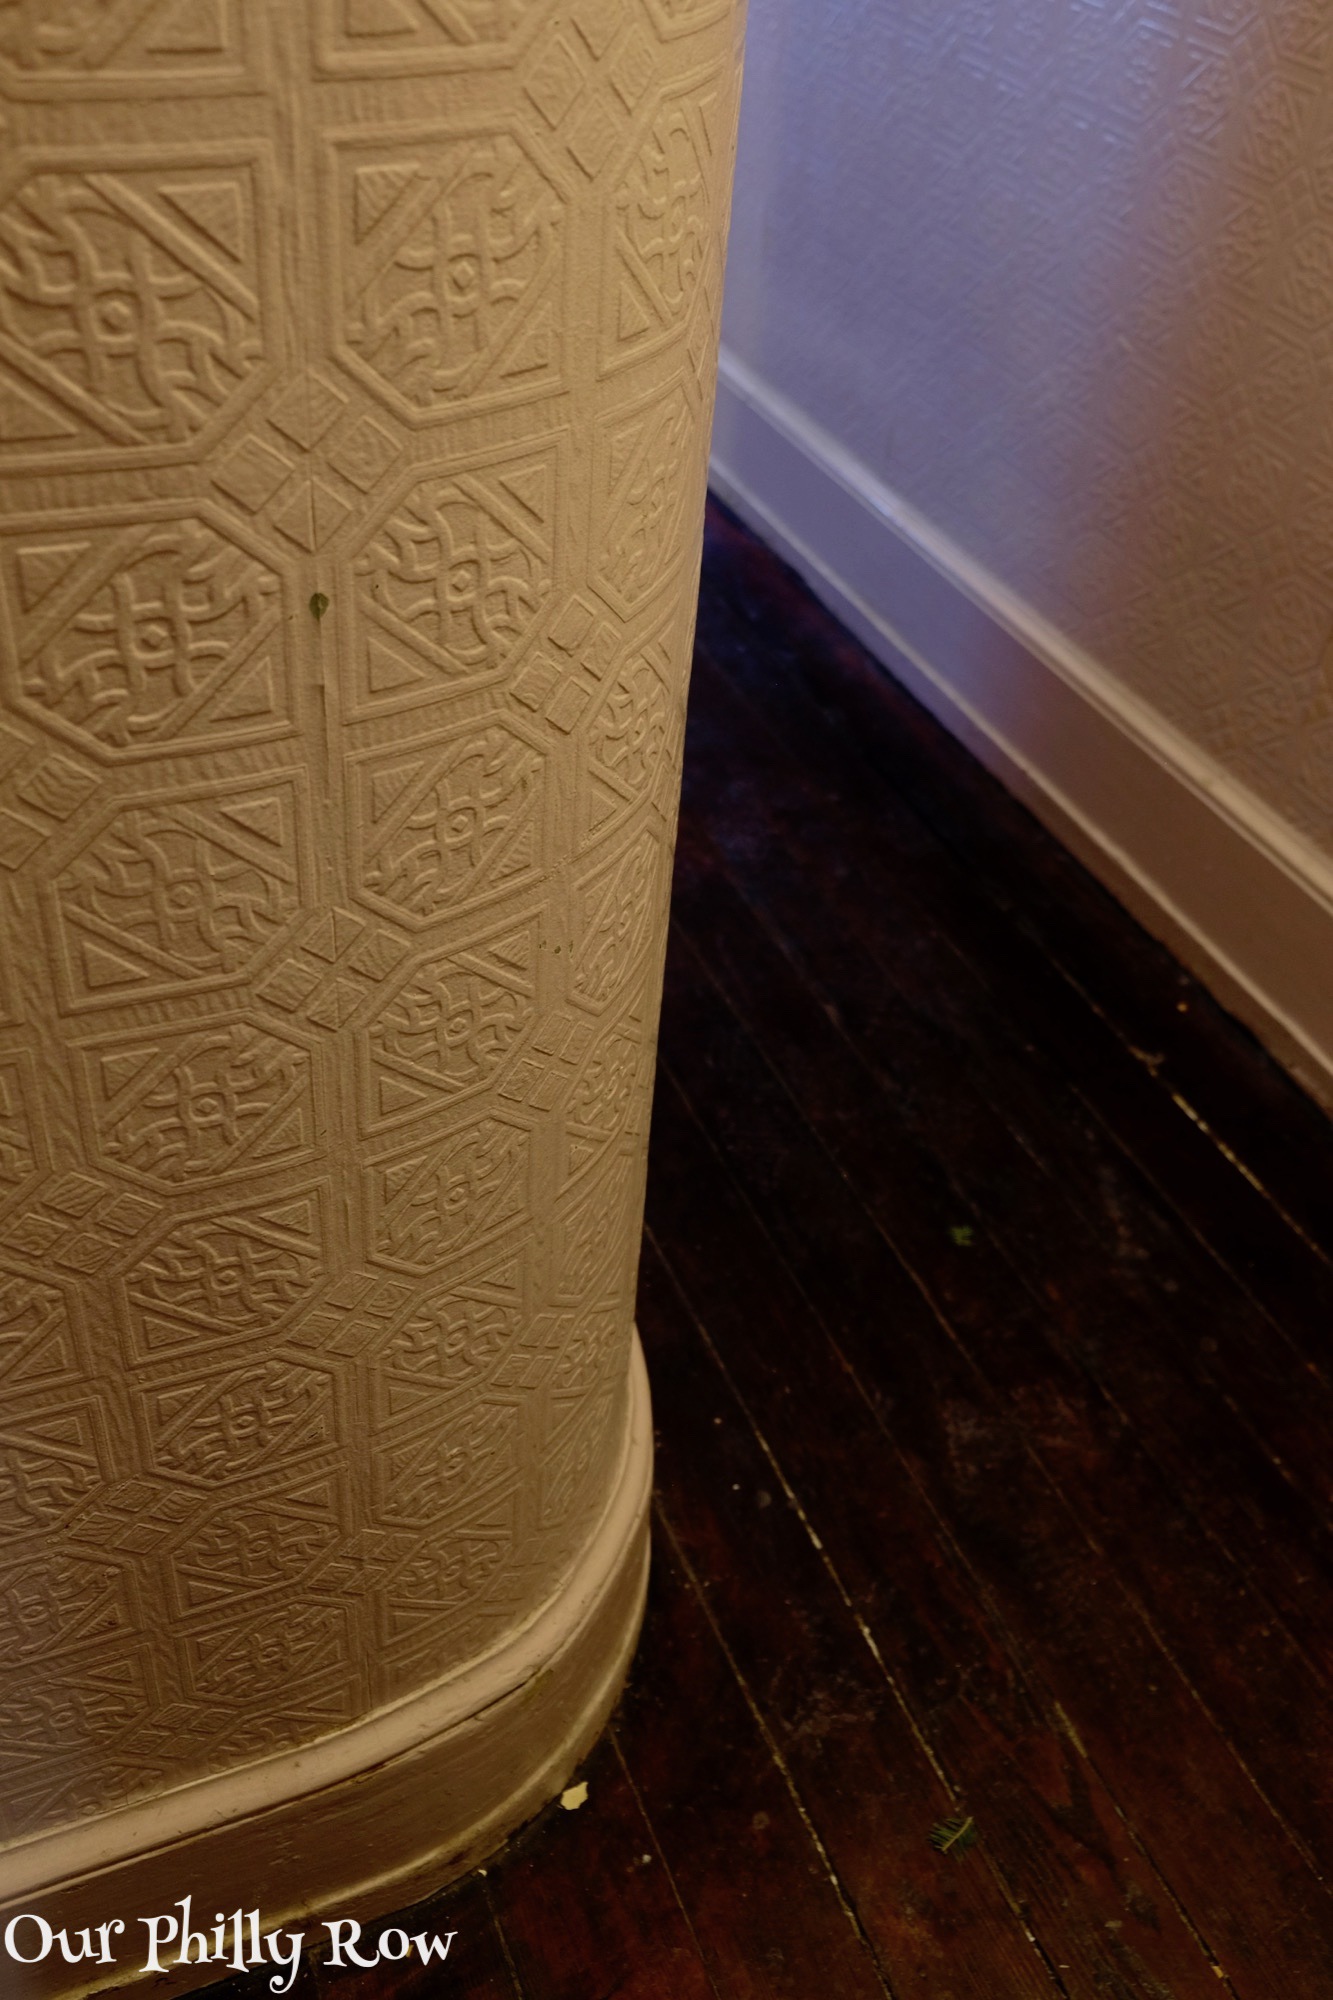
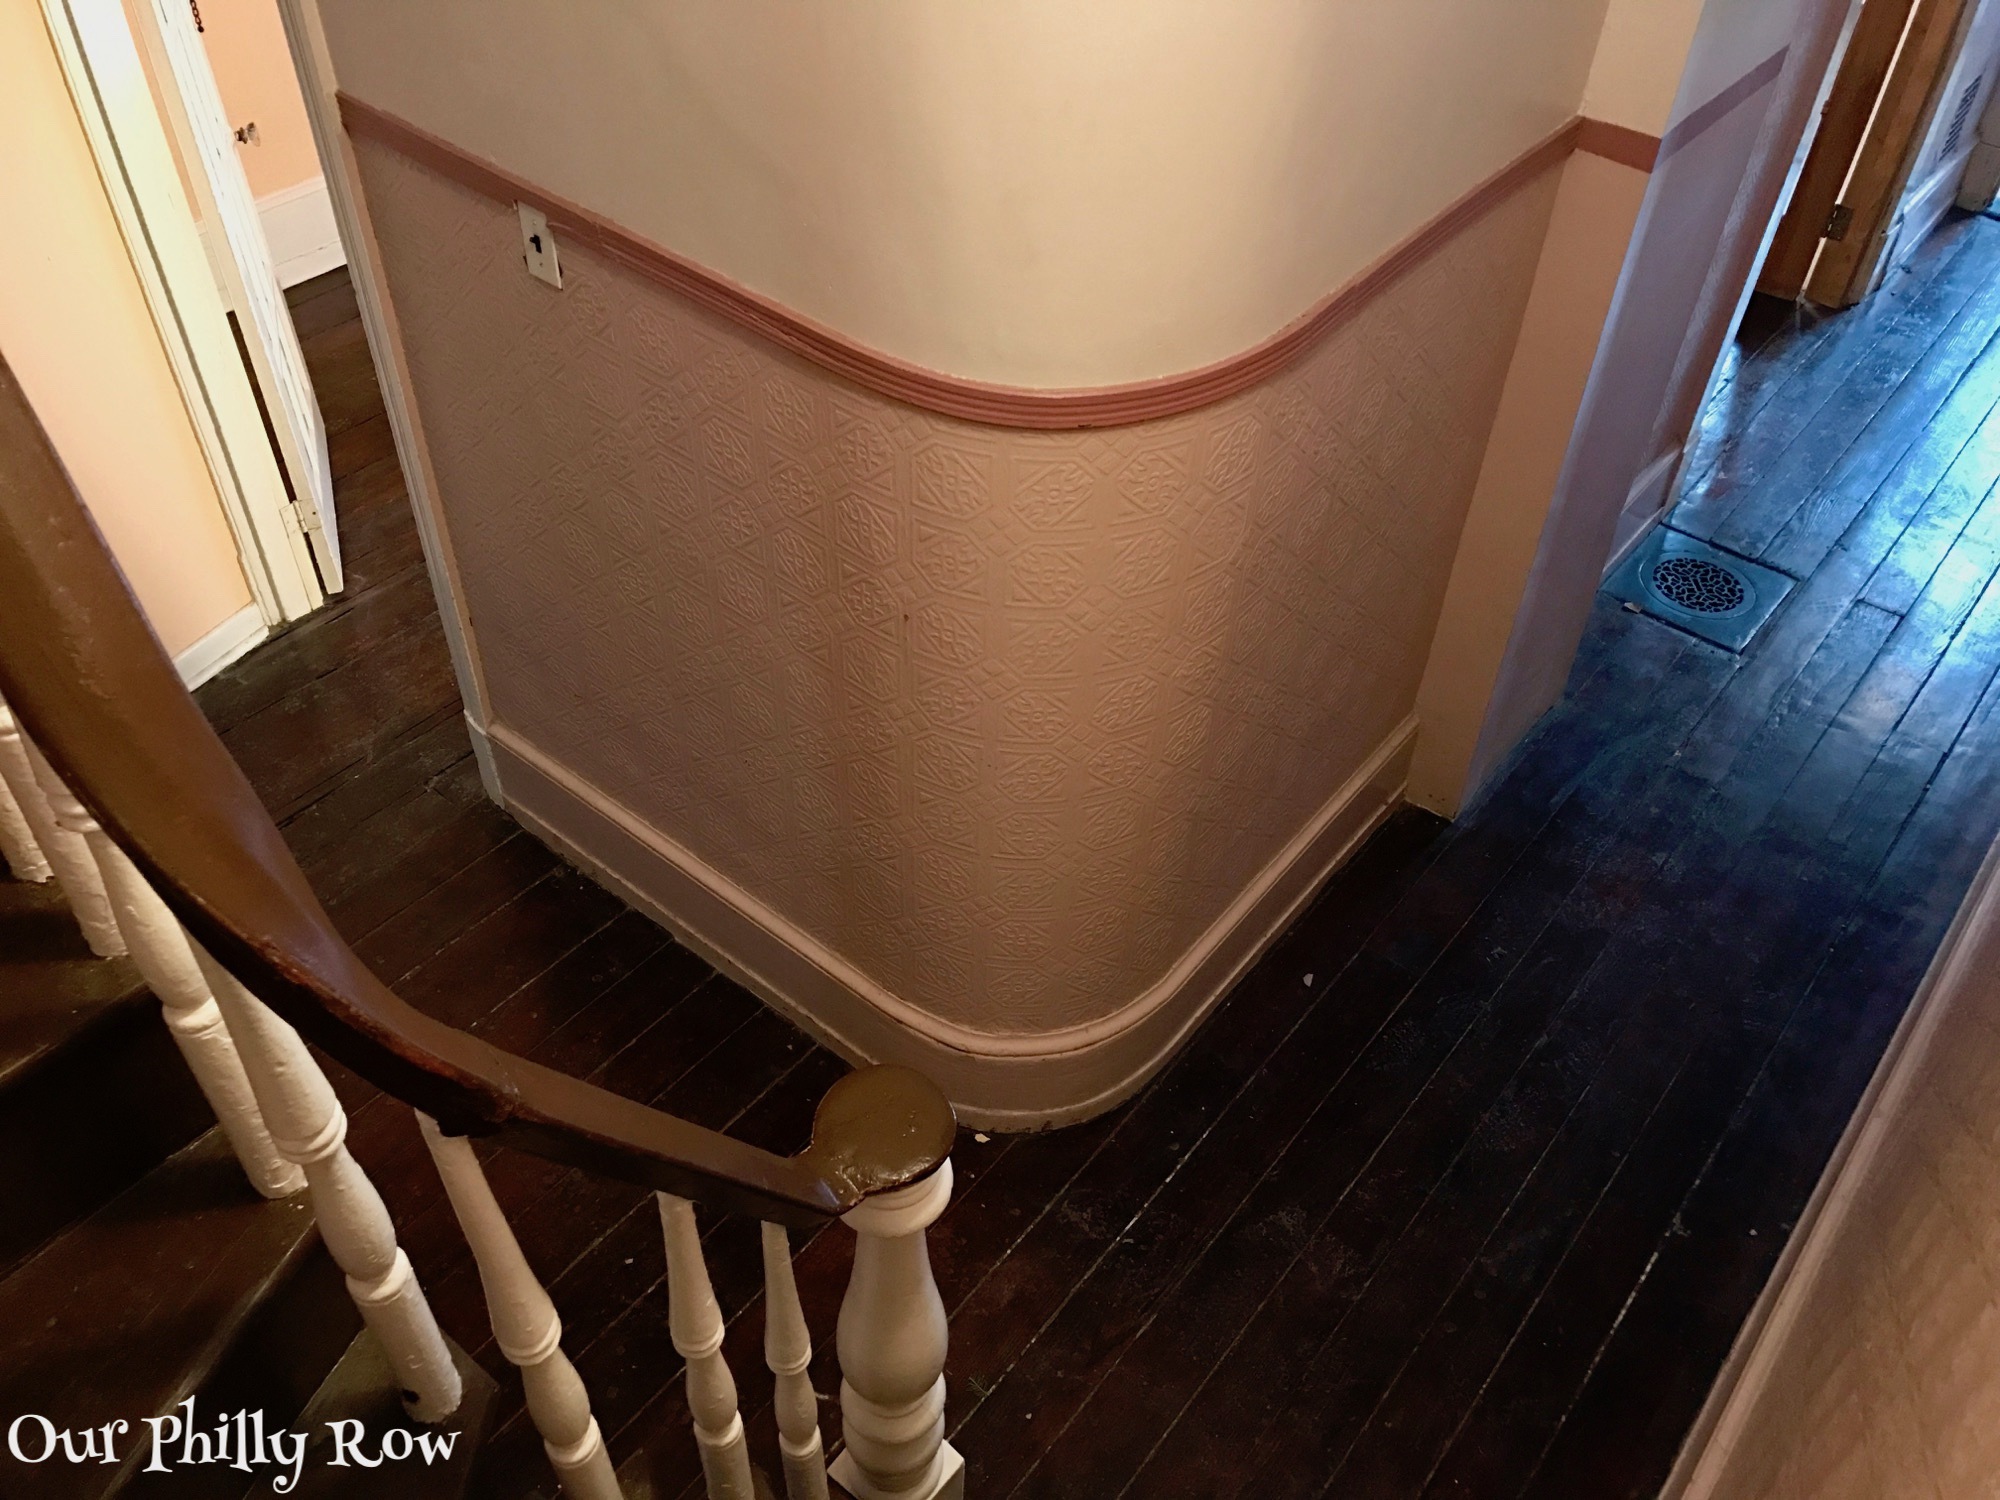
Here are two photos of the hall where you can see it.
I believe it to be from the 1880s when the owners did a whole house modernization (indoor plumbing, gas lighting, gravity heating, entry vestibule tile, etc…) Given that it has been there for 130-ish years, it is in relatively decent condition. But there are some trouble spots and one section which was covered when they added ductwork for the second and third floor in the second half of the 20th century. We plan to glue the loose seams down and paint it when we finally get to the hallway. For now, I see no reason to remove it, even if if is not in the best of shape. (Paint hides all sorts of sins in old houses.)
Fun! Anaglypta makes sense. Thanks for the photo — your hall has tons of character (I am coveting your staircase).
I m glad you took the time you needed, I was blessed to meet your mom at the wedding and I understand how much you miss her!
the bathroom is shaping up nicely in spite of all the many obstacles
(Love your trump message…I too hope we survive)
Very glad you’re feeling inspired once again!
XX
W
Thanks Wendy! My wedding day was definitely one of the highlights of my Mom’s life. She is missed, but she will always be with me. Glad you like the Trump message, I felt I had to leave something behind.
Thanks Stacy, Finding a sink to fit in what will essentially be a 36″ x 54″ room was a challenge, and I am hoping to find a way to get it hooked up before the rest of the room is complete.
So much progress! Did you wonder if the white ish tile was an asbestos product? We are doing an exploration project in our kitchen flooring and have found some faux brick tile that looks to be from the sixties-glue and staples! Also some Oddly Placed Cutouts In The Original Fir floor.
A word of caution on the new sink; we installed one very like it in our powder room and because it is so narrow and shallow there is alot of splash back on the walls and floor. Maybe it was the faucet choice also?
Awaiting the next exciting installment.
[…] see her. Take note that she is not amused by your shenanigans. Here is the link to read more about Devyn’s bathroom floor project. Also, learn more about Luan […]
[…] This of course is not true, I just haven’t done anything sexy. I take that back… Replacing the rotten floor under a toilet is not sexy, however, I did complete my sexy workbench in the basement. But of course, we […]