
The Medallion Miracle! (Part II)
To pick up from where I left off last week on my hunt for the perfect ceiling medallion, I get to tell you about my miracle, or what I believe to be a miracle. If you are just joining in, last week I went over my woes of finding the perfect ceiling medallion for our parlor. A hunt which has lasted for more than a year because I am not willing to settle for ordinary. So, lets pick up from where I left off…. Because to know me is to know that there is a story in there somewhere (there always is).

[Image: This stunning 1880s plaster medallion with electrified gas chandelier highlights a more organic stylistic period during the Victorian era. While beautiful, it would be too fancy for our house (not that it is available or anything). Source: Kristine Robinsons Interiors]

[Image: This circa 1910 crystal wedding cake chandelier would look stunning in our parlor (after a bit of restoration). However, it is so long, that it would hang less than six feet off of the floor.]
“I think we have a few downstairs in the basement if you would like to take a look.” To which I replied, YES! She led me over to the basement door, called down to Scott, who was working down there and asked him to show them to me. I climbed down the narrow basement stairs and found myself in a wonderland of antique things everywhere. In the back of the basement on several shelves, Scott showed me a dozen or so antique plaster medallions he himself had removed from old houses slated for demolition 20+ years ago. They were mostly moderately sized, but there on the middle shelf was a delightfully huge oval one and I was immediately filled with glee.

[Image: There on the shelf of the basement of the antique store was exactly what I was looking for for more than a year.]
OK, well, I did care how much it cost, so I followed him back upstairs to get the pricing of the big one, as well as another mid-sized oval one (just in case the one I wanted was like a million dollars or something). The price for the big one turned out to be a very fair $250. Not exactly a bargain, but for achieving my goal of having a historically accurate and perfectly scaled 130+ year old medallion in our parlor I could not be happier.
As I was leaving the store, I texted Y “I may have some exciting news about a ceiling medallion. More to come.” As soon as I filled him in when I got home, he wanted to see it so we made dinner plans nearby so that we could stop back by the shop for him to see it (and so I could get a couple of pictures). He had the same reaction, “It’s perfect!”. We had other things going on so we arranged to come back the following week for them.

[Image: Little did I know that this image earlier in April would turn out to be the exact same medallion I would later bring home. Source: Zillow]

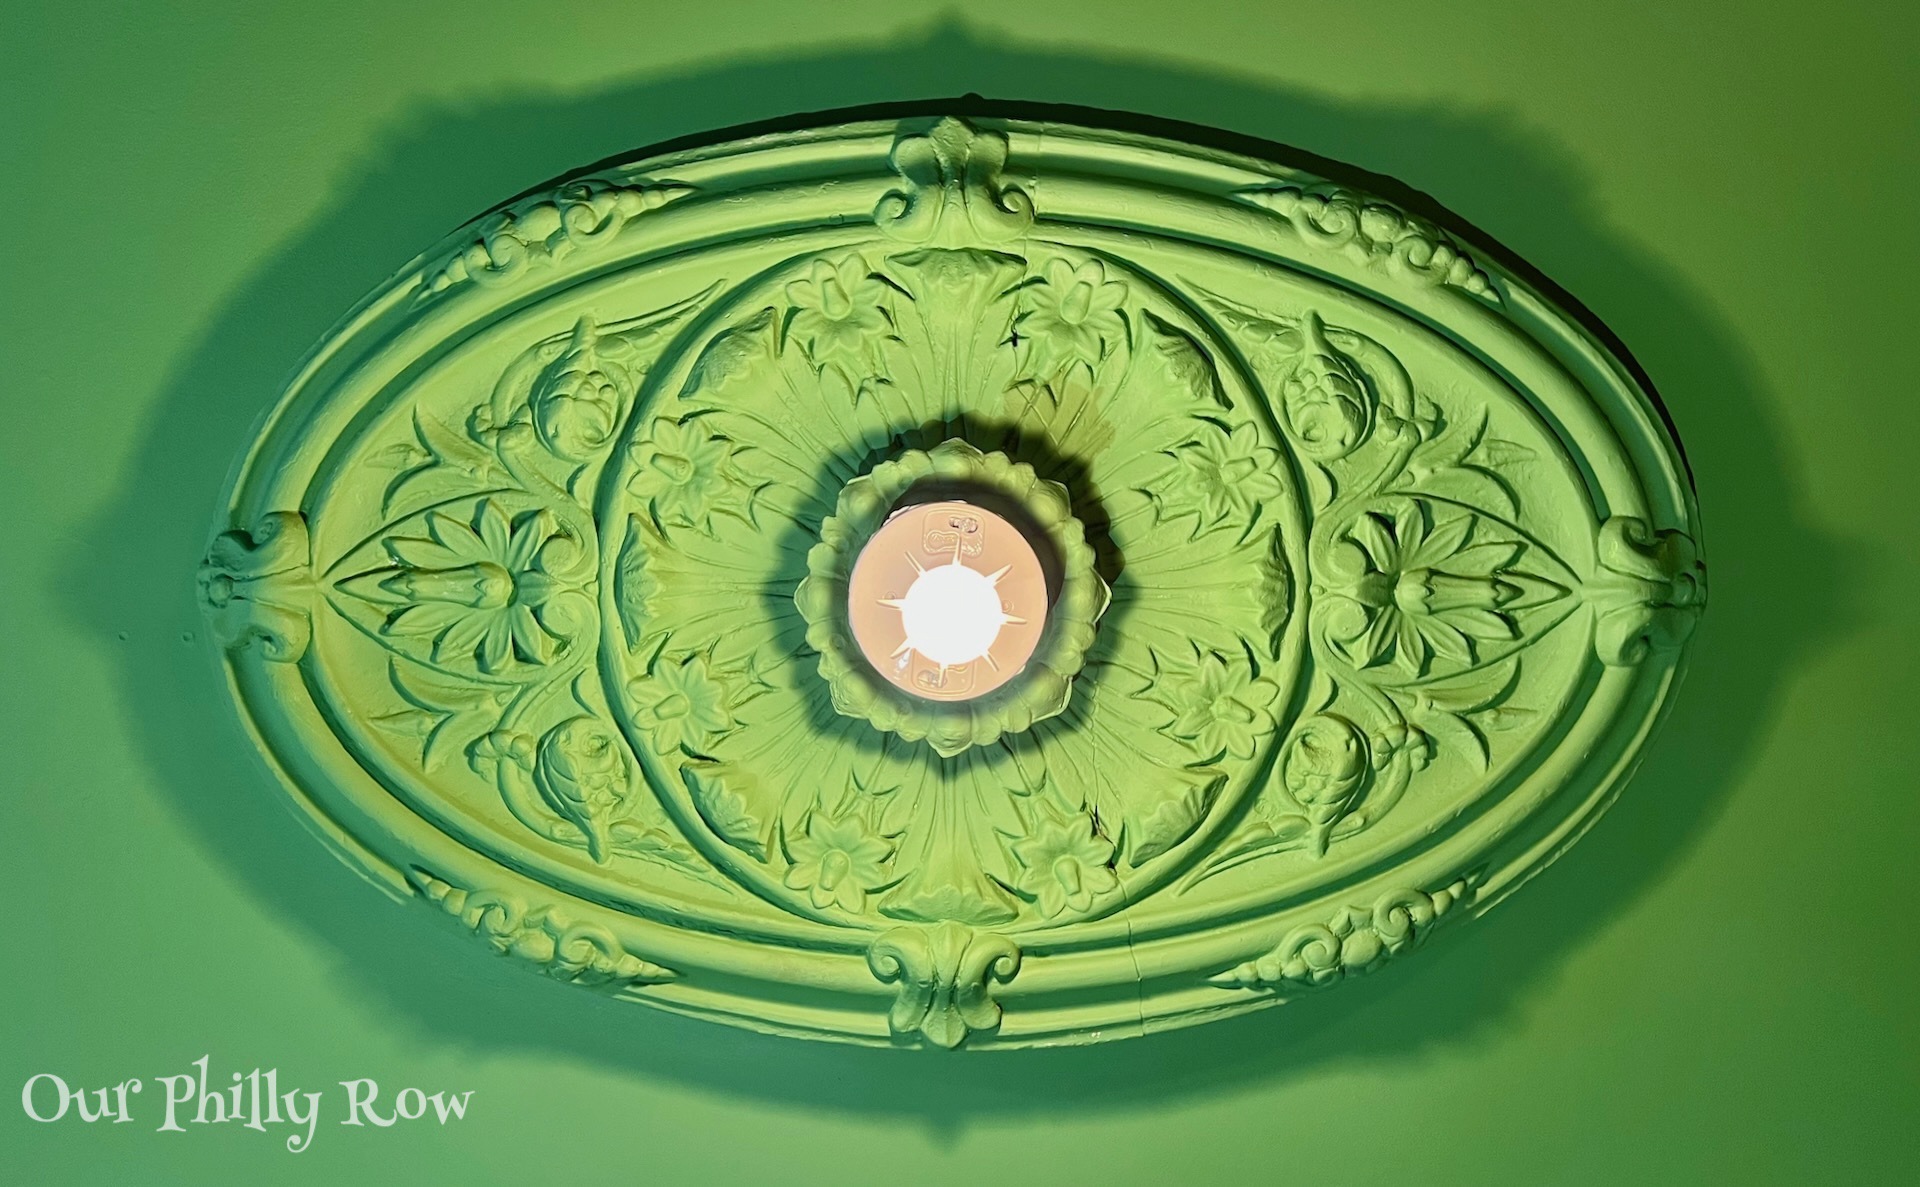
[Image: This is our medallion shortly after getting it home. Little did I know what lay beneath the chipping paint.]
What next? The plan was to clean it up, paint it to match the ceiling. Then using a template, transfer the shape to the ceiling, cut a hole in the ceiling just a bit smaller than the ceiling and fill it in with plywood anchored into the floor joists above. Once the medallion (and the ceiling) is ready, I can use screws to attach it to the ceiling through predrilled holes in the medallion. Then I will just need to caulk around it and fill the holes.

[Image: Close up of the medallion showing the loose paint]
[Lead Paint Statement: Before getting your undies in a bundle, I must explain that yes, I know that this is probably lead based paint. Yes, I am taking precautions. Yes, I am making sure that children and pets are not in contact with the medallion or the paint chips.]
Suddenly, my plans to just clean it up and paint it to match the ceiling are being called into question. The more I picked away at the chipping paint, the more I began to fall in love with it. I realized that painting it to match the ceiling is exactly the wrong thing to do. Not only will I need to clean it up, I will need to restore it!
But wait?!?!? Haven’t I always felt multi-color medallions to be a bit gaudy? In truth, yes… When I think of painted medallions, I always think of hideous McMansions with all sorts of polyurethane medallions and other trim added to the sheetrock ceilings (always around pot-lights) like the unfortunate example below. Or I think of overtly “painted lady” Victorian medallions like the one below that, pretty but just a bit too much for me.

[Image: Somebody thought this would look fancy on their McMansion ceiling. They were wrong. It looks cheap and tawdry.[Source: uDecor]

[Image: This is a beautiful 1880s medallion, but the colors are a far too “Painted Lady” for me. [Source: Home Talk]
There remains much to do to get it ready, and we are still months away from installing it. I have already spent about six hours removing the loose paint chips, but I may look for an alternative process. I was told I could soak it in a tub of water, but I am terrified that the plaster will just disintegrate. So, more to come on it. In the meantime, here is where I am at as of yesterday.

[Image: Close up of what I have managed to uncover as of this week.]
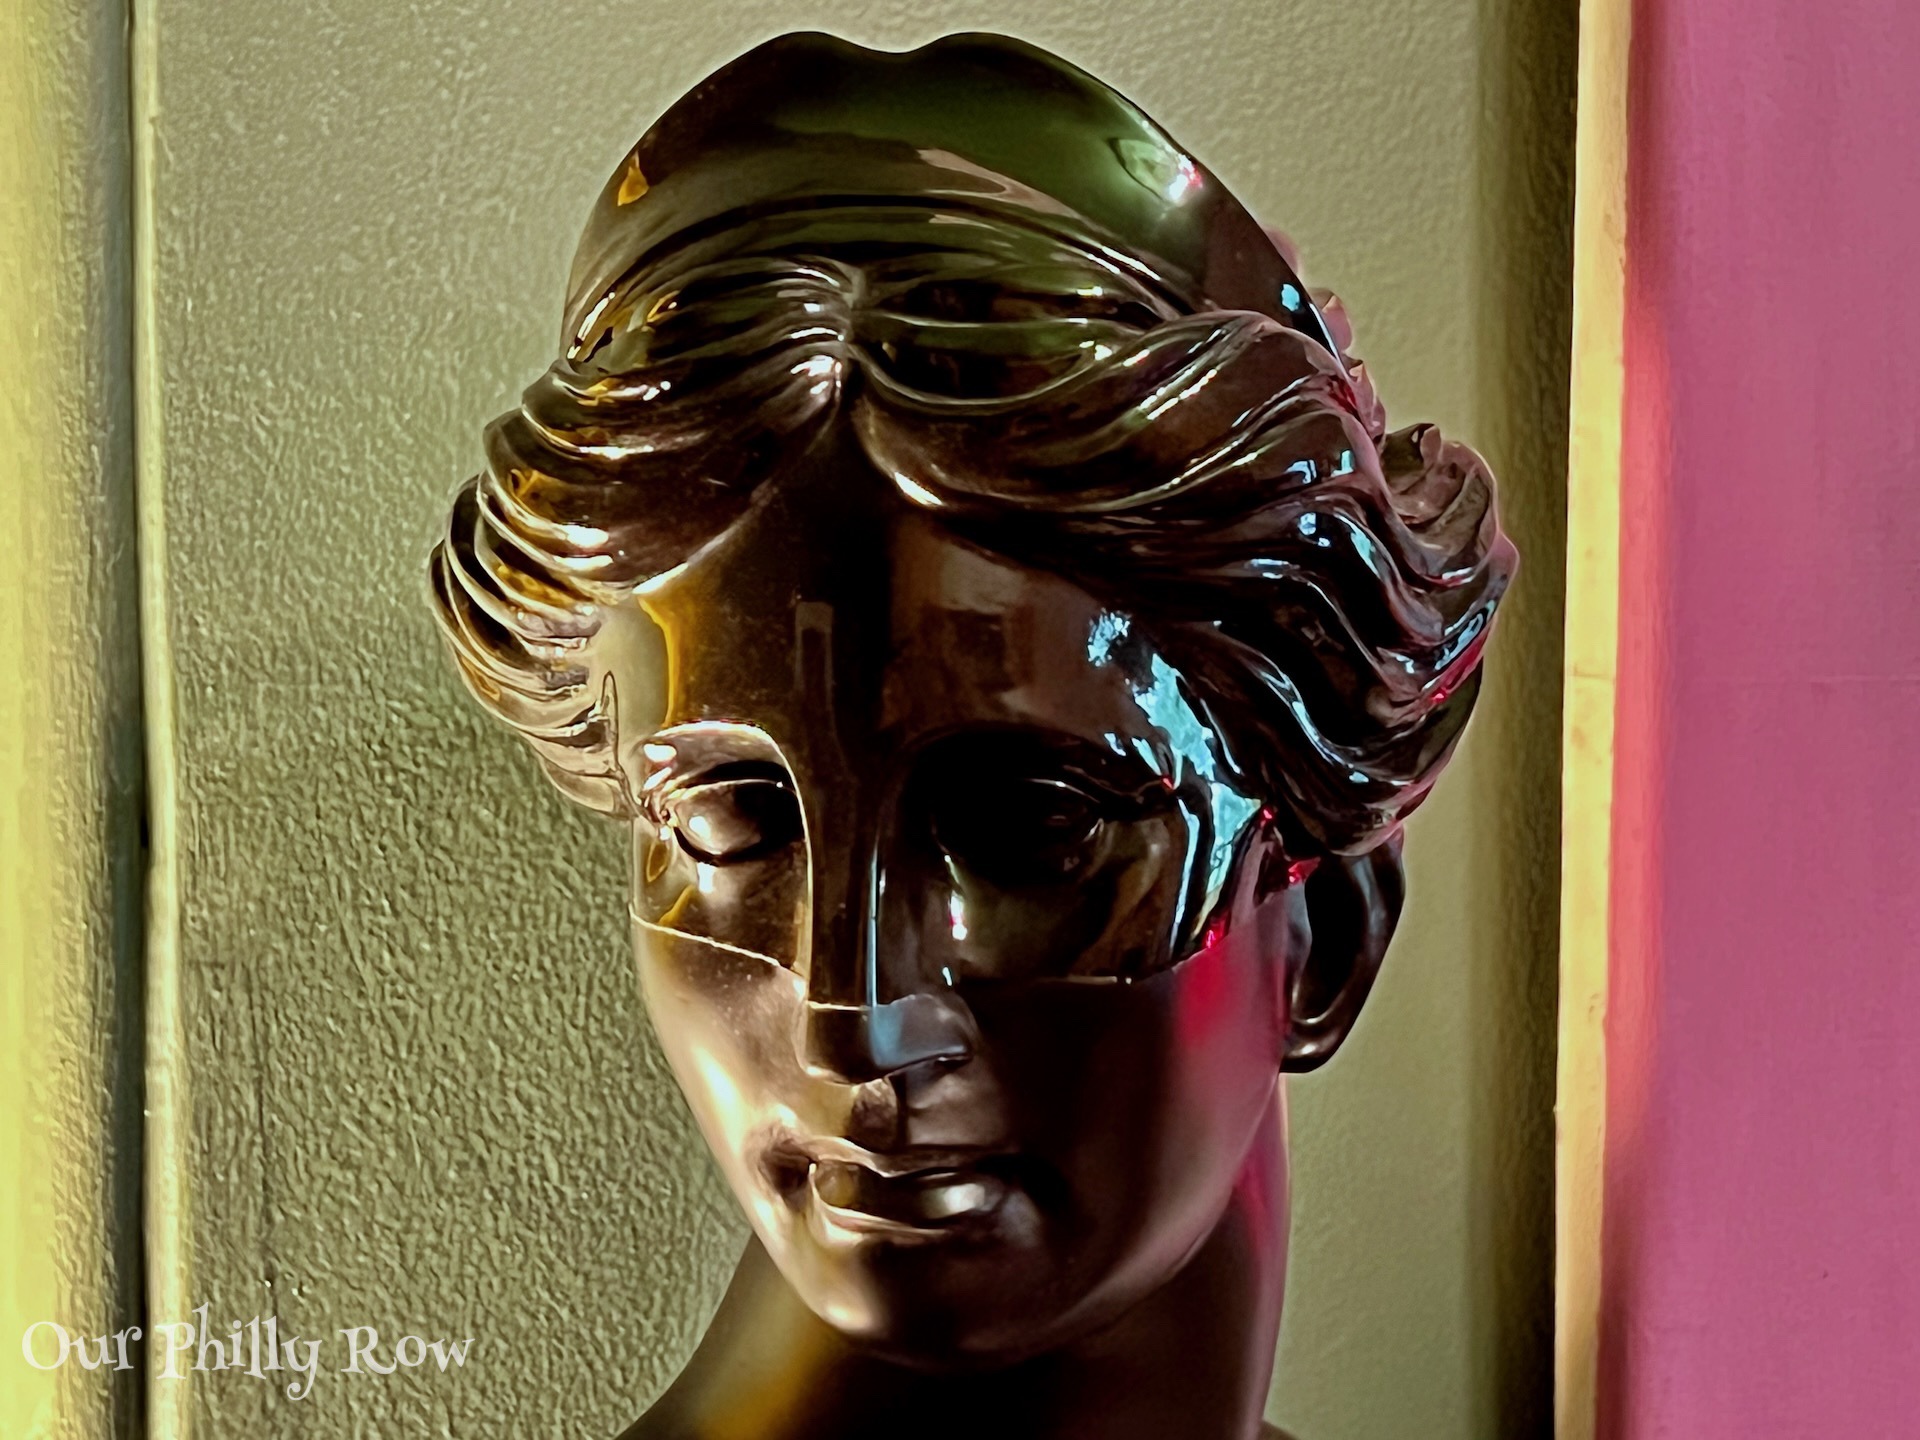
Oh, about that chandelier… We found a different one, and I will post about that soon as well. In the meantime, here is a photo of it in the back of our car (inside the black plastic bag). Ahead, I am working on a few posts about gorgeous things in general and other decorating plans and ideas for the house. I think you will be surprised…

[Image: Inside this bag is another gorgeous thing for the parlor. But you will have to wait to see it.]

I am so inspired by your passion and your persistence!!
Thanks DB! I think I am driven out of my fear of mediocrity. 😊
it’s gorgeous. And you supported a local business, what nice Synchronicity.
For the stripping maybe you could use Citri -Strip ( very gentle) and scalpels or the small blades airbrush artists use?
Citri-strip would take off all the paint though including the pretty bottom layer so maybe not. But you could get some of the little blades? The airbrush artists use them to cut frisket, X-Acto makes them.
😊😊 I considered stripper, but I didn’t want to deal with the mess. I have been reading about a technique of soaking the medallion in water for a few hours, but I am terrified it will disintegrate. The current process is tedious, and I do have unintended scrapes on the original plaster, but for now, I figure I should at least get as much of the loose stuff off as possible.
I have been using a razor blade for some of it. Most of it picks off fairly easily, but I am learning that the areas where there was metallic gold, the additional layers of paint are really stubborn to loosen up.
As for supporting Anastacia’s… It is to their benefit that they are so close to our house.
It’s so beautiful and old it would be cool if you can save some of the original paint. Pastels might not be so bad if you are painting the room a dark, dramatic color.
Water sounds risky.
Old building materials can be very hit and miss, often the special formula of an individual craftsman or whatever they had on hand. Plaster can be hard ( strong glue and chalk mixed with white pigment or marble dust ) or weak ( mostly chalk/ calcium carbonate bound with weak glue). A weak plaster could easily be destroyed by water. Seems risky.
And picking at it looks kind of fun!
😊😊😊 Picking at it definitely has an element of satisfaction. I am too nervous to soak in water, so I will keep picking away at it regardless of how I end up finishing it out.
Have you ever seen the Benjamin Moore color “Narangasset Green”? It might look nice with the underlying medallion colors.
You must have read my mind a while back. Narragansett Green was one of my first color choices for the living room.
I have been working on a post about my final color choice for the living room, hope to have it out in next couple of weeks.
This is such a cool story, Devyn. The Medallion is going to look beautiful. Watching you chip paint off of it was oddly satisfying too. 🙂
It is oddly satisfying indeed! But also frustrating at times when I unintentionally pick a chunk of plaster out instead of a chip of paint.
No newly-made (and synthetic) medallion could ever compete with the real thing; no matter how long it takes, your work will definitely be worth the extra effort. I look forward to following the evolution of this project!
Thank you! I have a keen eye for architectural fakery and it endlessly annoys me when folks attempt to pass off crap as history.
Just catching up. Love this story of synchronicity. Love that you found your ideal medallion that is truly a miracle. So excited to see the rebirth of the medallion. I shudder everytime I see such desecration of beautiful objects. Whatever you do will be better than what it was.
[…] I just use ‘sparks joy’ publicly? Ugh). I also put a lot of effort into finding the perfect ceiling medallion last year. But the one thing I struggled with the most was how to light the artwork. I had […]