
Putting Lipstick on a Pig – Kitchen Facelift Project
We have been in the house just over a month now and after our week in Cuba, I took a week to do absolutely nothing. Seriously, I did nothing beyond lounging about every day and surfing the Internets. It was a well deserved break after this past two years of marathon kitchen renovation, deciding to trade our life on the Upper West Side of Manhattan for a slower more relaxed life in Philadelphia, then dealing with all of the electrical and structural issues here at Our Philly Row, followed by the entire process of preparing, selling, and packing up our New York apartment, all the while working my full-time job.
But, those who know me, know that I have the attention span of a goldfish, so I cannot sit and do nothing for long. When we finally had all of our possessions moved to the house, I was unclear about what the first priority was, but a couple of weeks after we were in, it became clear that the first room to focus on would have to be the kitchen. I didn’t want to put all of the dishes in the cabinets only to take them all out again in six months to do the kitchen.

This is the result of a Big-box store vomiting a kitchen in the 90s. The green is a more recent change which is actually nicer than the pinkish tan it covered. Pretty? Ugh! (Image: Real Estate Listing)
The photo above shows the kitchen as it was in the listing photos and as you can see, it is a functional kitchen, but it is also an ugly kitchen. We know the house was an investment property for decades until the last owner bought it in the late 90s. We think the kitchen was last remodeled just before it was sold for the purposes of prettying up the house for resale. Lets just say that there is nothing of quality in the space and beyond having a stove and refrigerator (which died two weeks after we took possession), the only fancy thing is that there is a garbage disposal.
We do have big plans for the kitchen in the future involving a major overhaul of the entire rear wing of the house, which will involve not just the kitchen, but also the adjacent dining room and the guest room/guest bath above it. This of course will cost money, and for now, there are higher priorities. So given that we are likely several years away from diving into that money pit, we are going to make it work as it is. Well, as it is with some lipstick added to make it less offensive when you walk in.
The goal of our lipstick-on-a-pig update is for maximum impact with minimum budget. With left over supplies from New York, as well as repurposing things we already have, I managed to come up with a plan on the cheap which will tie us over until we can dive into the real kitchen renovation. Here is the breakdown of my plans for the kitchen.

A hint at what is to come. I completed the walls last week. The top is Tundra, a very pale gray, the bottom is Dior Gray, both from Benjamin Moore. The line is the same right as the base cabinets. I carried the line directly across the door to keep the continuity.
Paint everything! Walls, ceiling, and cabinets (including the insides of the uppers). We are fortunate that there was plenty of left over paint from our NY apartment so we only needed to buy a quart of paint to do the interiors. I am doing the upper cabinets in Benjamin Moore – Chantilly Lace (2121-70), the lower cabinets and lower walls in Benjamin Moore – Dior Gray (2133-40), and the upper walls and ceiling will be in Benjamin Moore – Tundra (2133-70). The only paint I needed to buy was for the interiors of the uppers. I spent $15.00 on a quart of paint…. As for the color?… For those who are following along on Instagram I posted it to an Instagram story week before last. If you missed it or aren’t following me on IG, you are going to have to wait till next week… Or you can follow me on Instagram (@ourphillyrow) and I may reveal it again before then.

This shot taken while I was painting the extremely textured ceiling from green to Tundra. The porcelain socket replaced the hideous ceiling fixture that was there when we bought the house, but it will be replaced soon.
Replace the ceiling light: The light that was there when we bought the house had to be destroyed as soon as possible lest the ugliness of it spread to other areas of the house. When we had the electrical updated last year, I had our electrician install plain porcelain sockets in every ceiling box. So for the kitchen update, I set an impossible budget limit of $25.00, and came damned close to it! I will fill you in next week on the light fixture.

Primer on the uppers completed. The doggy clock at the top was left behind by the previous owner… It is totally not our style, but we both love it.
Replace the vent hood above the stove: The existing range hood is a bottom of the line recirculating hood in the color almond. It is also caked with grease and cat hair. I decided that I could replace it with the exact same thing in white and it would only cost $44.00
Add under cabinet lighting: I simply cannot understand how anybody can live without under cabinet lighting. In our kitchen it is especially needed because the sink is in the corner and it gets mighty dark back there. I kept it simple and went with an LED strip lighting set from Amazon for about $16.00

I found the cabinet pulls at Lowe’s for only $2.88 each. Not something I would choose for a real kitchen renovation, but good enough for now.
Replace the cabinet hardware: The cabinet pulls were too ugly to reuse, and there were no pulls on the three drawers. So I searched the isles of Lowe’s and found simple ones that are less than $3.00 each totaling up to less than $44.00. The hinges are not very pretty either, but they worked and I could not justify replacing them.
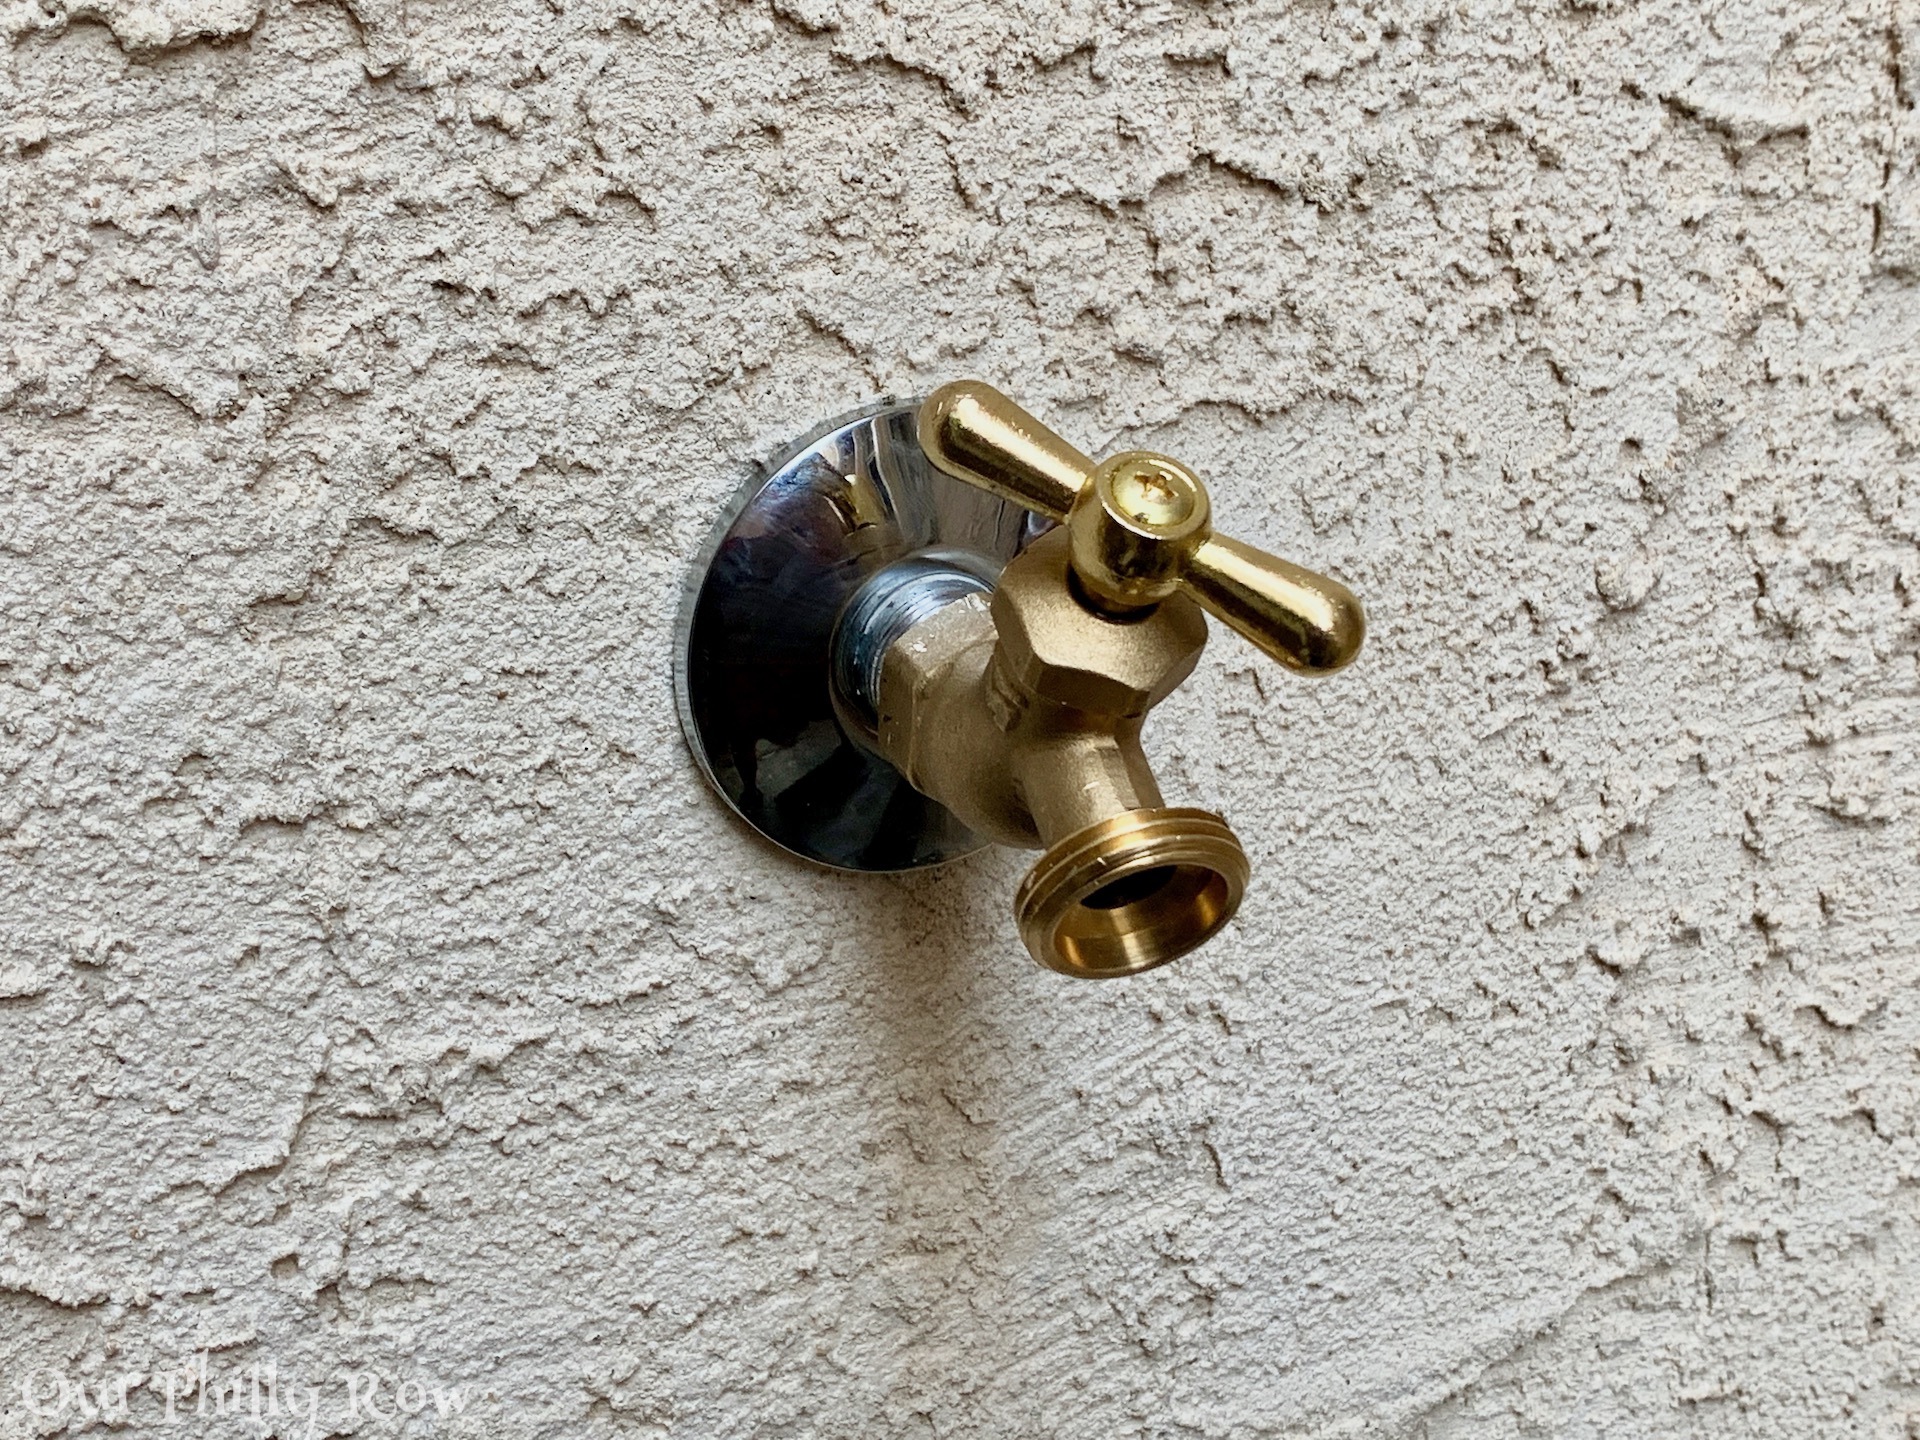
Replace the faucet: The existing faucet was about 20 years old. It was ugly, corroded, and constantly dripped. I didn’t want to invest too much knowing it was only for a few years, but I do not buy the cheapest faucet ever as I don’t trust cheap plumbing fixtures when under constant water pressure. We also could not live without a pull out sprayer, so we ended up with a basic Pfister pull out faucet for $78.00.

This was our fauxdenza in the entry gallery of our New York apartment. With the purchase of one more unit, it has been reconfigured and repurposed as a kitchen storage/microwave cabinet.
With limited storage in this kitchen, it occurred to me that I could repurpose the “fauxdenza” from the entry gallery of our New York apartment into a kitchen storage unit. The fauxdenza was an assembly of three IKEA Sektion kitchen cabinet boxes attached to each other with a wood top. It was too long for our kitchen, but with the purchase of another cabinet box for $45.00, I reconfigured it to be two over two creating storage as well as a convenient spot for the microwave. It does block the window just a bit, but it works.
All in all, we are in less than $300 when small incidentals are factored in. Not bad! I hope to wrap the work up by this weekend and I am planning to post a full lipstick-on-a-pig reveal next week.
Stay tuned!
Oh, and one more thing…. You must watch this adorable video of Bixby devouring his dinner.

I can’t wait to see the full reveal! I guess, maybe, I understand, theoretically, why the previous owners extended the army green onto the ceiling, but that close up of you painting it Tundra just made me happy. That dark color must have been so oppressive! As always, hats off to you for painting kitchen cabinets–I hate doing it so much!
The question is why did the previous owner choose this awful green for a small dark room? It, like all of her other color choices, has felt oppressive from the first time I saw it. Now that the upper walls and ceiling are Tundra, it feels MUCH BIGGER! Even with the low 7′ 9″ ceiling.
As for the cabinets…. Trust me, I hate painting the cabinets… It was total de ja vous to two years ago when I was painting more than 100 pieces of cabinetry for our last kitchen. It is much easier to do this in the basement than it was in our apartment though.
I know that it’s going to spectacular and look forward to watching the progress!
Hi Bixby…Love you!!!
Thanks Wendy!
Bixby says…. Waggy waggy waggy 🙂
Your paint idea is absolutely genius! The combination of that green paint and the color of the cabinets was not a great choice, but it’s going to look so chic with Tundra and Dior Gray. Can’t wait for the reveal!
Thanks Maya,
I was inspired by this beautiful kitchen by British Standard. It definitely has a more sophisticated feel than it did as a green kitchen with cheap oak cabinets (not that it was hard to make that more sophisticated).
Ugh, my cabinet painting PTSD is almost gone. Almost.
I’m curious about this light fixture that was worse than a bare bulb now.
Ha, I have been dragging the painting of the cabinet doors for a couple of weeks. Almost done now. I have no doubt that I will encounter this issue again when we do our full remodel in a few years. But, I’ll cross that bridge when we get there.
As for the ceiling fixture… Trust me, a porcelain socket is much nicer than what was there. I looked for a photo of it from last year, but alas couldn’t find one. Then I realized we still had the fixture laying in the back of the dining room. So, here is a photo of it as of today.
I really appreciate the porcelain socket for it’s timeless, simple, and functional design. I also like that it has basically remained unchanged for nearly 100 years. I much prefer them to any of the fixtures which were in the house when we bought it.
[…] with the list from my last post, here is the breakdown of how it […]